Whether it’s the rich taste; the feel-good effects; or the health properties – we love our specialty foods.
Especially foods like chocolate, tea, wine, and coffee. For some reason these foods bring out the inner connoisseur in all of us. And once we get a taste of the good chocolate, coffee, wine, or tea, it’s hard to go back to the corner store variety.
That’s why in today’s newsletter, I’d like to share with you an excellent way to roast and brew your very own tasty (and healthy) coffee.
Why roast your own
Now, there are a host of reasons for going this route. Home roasted coffee, starting from green coffee beans:
Is much fresher
Most store bought and coffee shop coffee is roasted and/or ground months in advance. This leads to stale coffee that’s been subject to oxidation. Even if it’s in vacuum sealed bags.
Tastes better and offers more control
Freshly roasted coffee tastes and smells better. Plus, at home, you can control the type of roast. Light, medium, or dark roast – it’s totally up to you.
Has a higher antioxidant content
Typical processing includes weeks between roasting and grinding. And plenty of time before the beans are brewed. In this time, coffee loses a significant percentage of its antioxidant content. With home roasts you eliminate the added time and your perfect morning cup is healthier.
Makes you look like a culinary magician in front of friends and family
Imagine how impressed friends and family will be when you create fresh coffee right in front of their eyes. Most people don’t even know coffee beans start out green. You’ll not only know that, you’ll be the bean master.
Roasting coffee at home: Step by step
Recently I set out to find the best way to roast, grind, and brew my own coffee at home.
Well, scratch that. Nowadays there are a host of specialty devices that roast, grind, and brew the coffee for you. With them you’re promised caffeinated perfection. Unfortunately, the costs can add up. Just the other day I read an article that basically said that without $1000 invested in specialty equipment, you might as well not bother.
Bollocks! Below you’ll find a simple roasting, grinding, and pressing process that requires no specialty equipment. And that brews an awesome cup every time. One that tastes rich and fresh. One that’s loaded with antioxidant power.
Step 1: Preheat the oven
Preheat your oven to 450 degrees, using convection roast or convection bake settings, if possible. Of course, if your oven doesn’t have convection, that’s OK. Regular bake will be fine.
Note: it’s important to turn the oven fan on high throughout the roasting process. Coffee roasting can produce a lot of smoke, especially if you try for darker roasts.
Step 2: Flatten your bake tin
Start with a vented aluminum bake tin. Pulling apart the sides, flatten the tin as much as possible.
Next, smooth out the tin so that it can lay flat on the counter. You’ll do this so the beans can be shaken around during the roasting process.
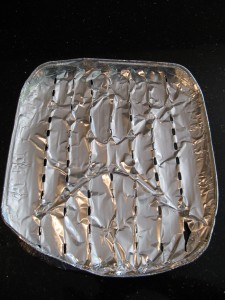
Step 3: Lay out the beans
Spread green, unroasted coffee beans out on the flattened bake tin. Place into the preheated oven once it hits 450 degrees.
Note: use only enough beans for 1-2 days of coffee drinking. The fresher the roast, the healthier (and tastier) the coffee.
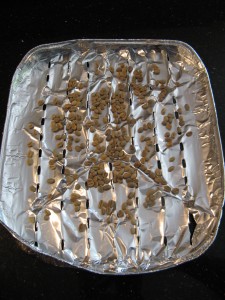
Step 4: Roast for 3-5 minutes
Roast the beans with oven closed for 3-5 minutes and then open the oven to shake the beans around.
Note: it’s important to give them a good shake, flipping them over and moving them to a new location on the pan. If you don’t do this the beans will roast unevenly, leaving some overdone and some underdone.
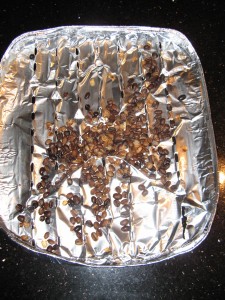
Step 5: Roast for 3-5 more minutes
Place pan back in the oven and roast for 3-5 more minutes or until desired roast is reached. See roast chart below for roast colors and descriptions.
Note: if your roast takes longer than 15 minutes, you should roast at a higher temperature. Every oven is different, so it may take several batches to achieve the best results. Practice makes perfect!
Also note: it’s OK if the beans aren’t roasted evenly. Some connoisseurs prefer a perfectly even roast color. However, a mixed roast offers a nice complexity of flavor.
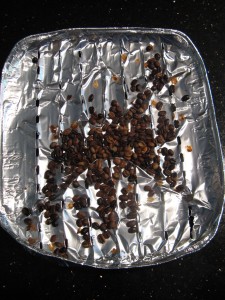
Step 6: Cool the beans
Once beans have reached the desired roast, quickly place into a colander to begin cooling. While cooling in the colander, shake the beans around to remove some of the skin.
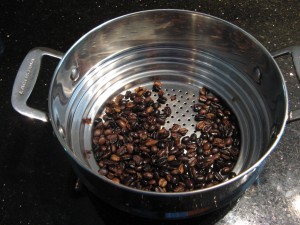
Step 7: Allow the beans to rest/degas
At this point you can move straight to grinding and pressing. However, fresh roasted coffee reaches its peak flavor and aroma about 24 hours after roasting. This rest period allows excess CO2 to dissipate and allows the coffee bean to stabilize. However, this period isn’t necessary and, in fact, some of the antioxidants are lost if you wait.
So, if you’re looking for the absolute best flavor, you can let the beans rest. If you’re looking for a great cup of coffee right away, one with a higher antioxidant content, you can skip this step.
Step 8: Grind the coffee beans
Using a blender of Magic Bullet (my preferred grinder), grind the coffee beans into a fine powder. The finer the grind, the less time needed to steep. The courser the grind, the more time. With a coffee press, the ideal size is larger to prevent grounds from sneaking into your coffee and appearing at the bottom of your cup.
Step 9: Steep and press
Use coffee quickly after grinding as the taste and health properties are superior the closer you get to roasting and grinding.
The right ratio of coffee to water is 1 tbsp coffee to 1 cup of water. So, if you want to make 4 cups of coffee, start by putting 4 tbsp of coffee into the French Press / Coffee Press. Next, add 4 cups of water that’s not quite boiling.
Next, stir gently.
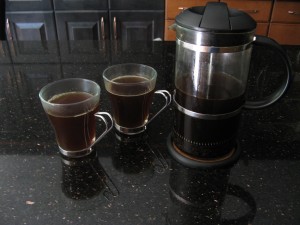
Finally, add the filter and steep for 2 – 4 minutes (2 min for a small pot and 4 min for a larger). At the end of the steep time, press plunger down evenly to prevent grounds from escaping.
Roasting coffee chart
![]()
Cinnamon Roast
The bean is light brown, and dry with no oil visible. The flavor is baked or “bready”, like toasted grain. There will likely be definite sour tones.
New England Roast
This roast is apparently common in the eastern United States. It’s a little darker than the cinnamon roast, but without the grainy flavor. New England roast will still have some sour tones to it.
American, Light roast
Medium light brown beans. This roast is typical in eastern USA. This roast is the most often used for cupping or professional tasting.
City, Medium Roast
The color is darker still, more of a medium brown (think chocolate). This roast is common in the western parts of the USA. This roast is a good choice to taste the differences between varietals.
Full City Roast
Medium dark brown beans. The beans will start to show some oily drops on the surface. Full City will have caramel or chocolate undertones.
French, Espresso Roast
Beans are starting to get dark brown, and French roasted beans are shiny with oil. There is less acidity, but with burned undertones. This roast is often used when making Espresso.
Italian, Dark French Roast
Similar to regular French, but more so. Darker and oilier looking, and with a stronger burned flavor.
Spanish Roast
Darkest roast of all. Color is nearly black, and the flavor is flat with a charcoal undertone.
For more great food information and recipes
Also, if you’re looking for more great food information, including delicious recipes, check out Gourmet Nutrition Volume 2.0.
With Gourmet Nutrition we’ve taken the healthiest ingredients and whipped them into nearly 300 pages of delicious culinary creations that you can serve with confidence to the most discerning foodie – or the most nitpicky nutritionist. We’ve included detailed cooking instructions and ideas for improvisation. And we’ve even photographed every recipe in beautiful color to show you just how appetizing healthy food can be.
Gourmet Nutrition is the cookbook that’s as friendly to your body as it is to your taste buds, and it’s a centerpiece on your kitchen counter and your coffee table. Pick it up, read it through, and try it out – we know you’ll love it!
Eat, move, and live… better.©
The health and fitness world can sometimes be a confusing place. But it doesn’t have to be.
Let us help you make sense of it all with this free special report.
In it you’ll learn the best eating, exercise, and lifestyle strategies — unique and personal — for you.


Share